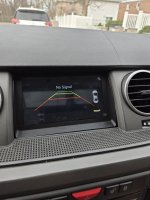
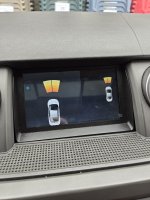
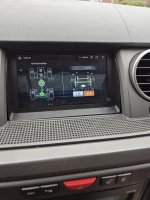
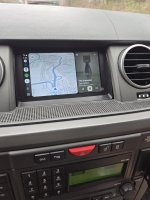
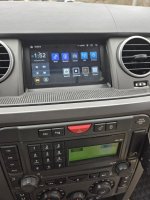
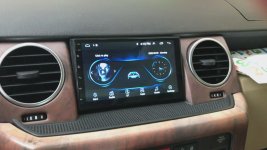
One of the biggest convenience drawbacks of these vehicles is the outdated tech and infotainment. Particularly the Nav screens on the HSE LR3’s. Came across a solution for CarPlay/Android Auto on a Facebook group and finally pulled the trigger myself. All in its $150 or so and am pleased with the very OEM looking result.

Supplies:
- CarPuride 701w screen - Amazon
- Fiber optic loop (if equipped with factory Nav screen) - Amazon
- (If not fitted with factory Nav) plastic Nav screen surround and metal mounting bracket (behind the dash).
From there it’s relatively simple.
- Pop dash, remove existing bracket and screen.
- Install fiber optic loop.
- Modify the plastic surround so the new screen will sit flush on the back of it.

- Bond screen to frame with your adhesive of choice.

- The bottom left and middle of the metal bracket need to be trimmed to allow for clearance of the power cord where it plugs into the screen. Trim top portions of the bracket as needed to allow for the larger screen to seat properly.

- Route power and audio cables through the dash. Power plugs into cig lighter (have plans to hardwire). Audio routes to aux cable in rear of center console.
Put the dash back together and you’re set. You can email them and they will even put the LR logo on the start screen for free. Apologies for lack of photos but it is more intuitive when you dig into things. Have been pleased with it so far and thought others may have interest so wanted to share. Doesn’t match some of the larger (some too large) screens in modern vehicles but is a nice update, particularly voice to text
Supplies:
- CarPuride 701w screen - Amazon
- Fiber optic loop (if equipped with factory Nav screen) - Amazon
- (If not fitted with factory Nav) plastic Nav screen surround and metal mounting bracket (behind the dash).
From there it’s relatively simple.
- Pop dash, remove existing bracket and screen.
- Install fiber optic loop.
- Modify the plastic surround so the new screen will sit flush on the back of it.
- Bond screen to frame with your adhesive of choice.
- The bottom left and middle of the metal bracket need to be trimmed to allow for clearance of the power cord where it plugs into the screen. Trim top portions of the bracket as needed to allow for the larger screen to seat properly.
- Route power and audio cables through the dash. Power plugs into cig lighter (have plans to hardwire). Audio routes to aux cable in rear of center console.
Put the dash back together and you’re set. You can email them and they will even put the LR logo on the start screen for free. Apologies for lack of photos but it is more intuitive when you dig into things. Have been pleased with it so far and thought others may have interest so wanted to share. Doesn’t match some of the larger (some too large) screens in modern vehicles but is a nice update, particularly voice to text
Last edited: